
The information and tutorials found within this article are designed to help you interact with the canine model layers and labels.
Layers Panel
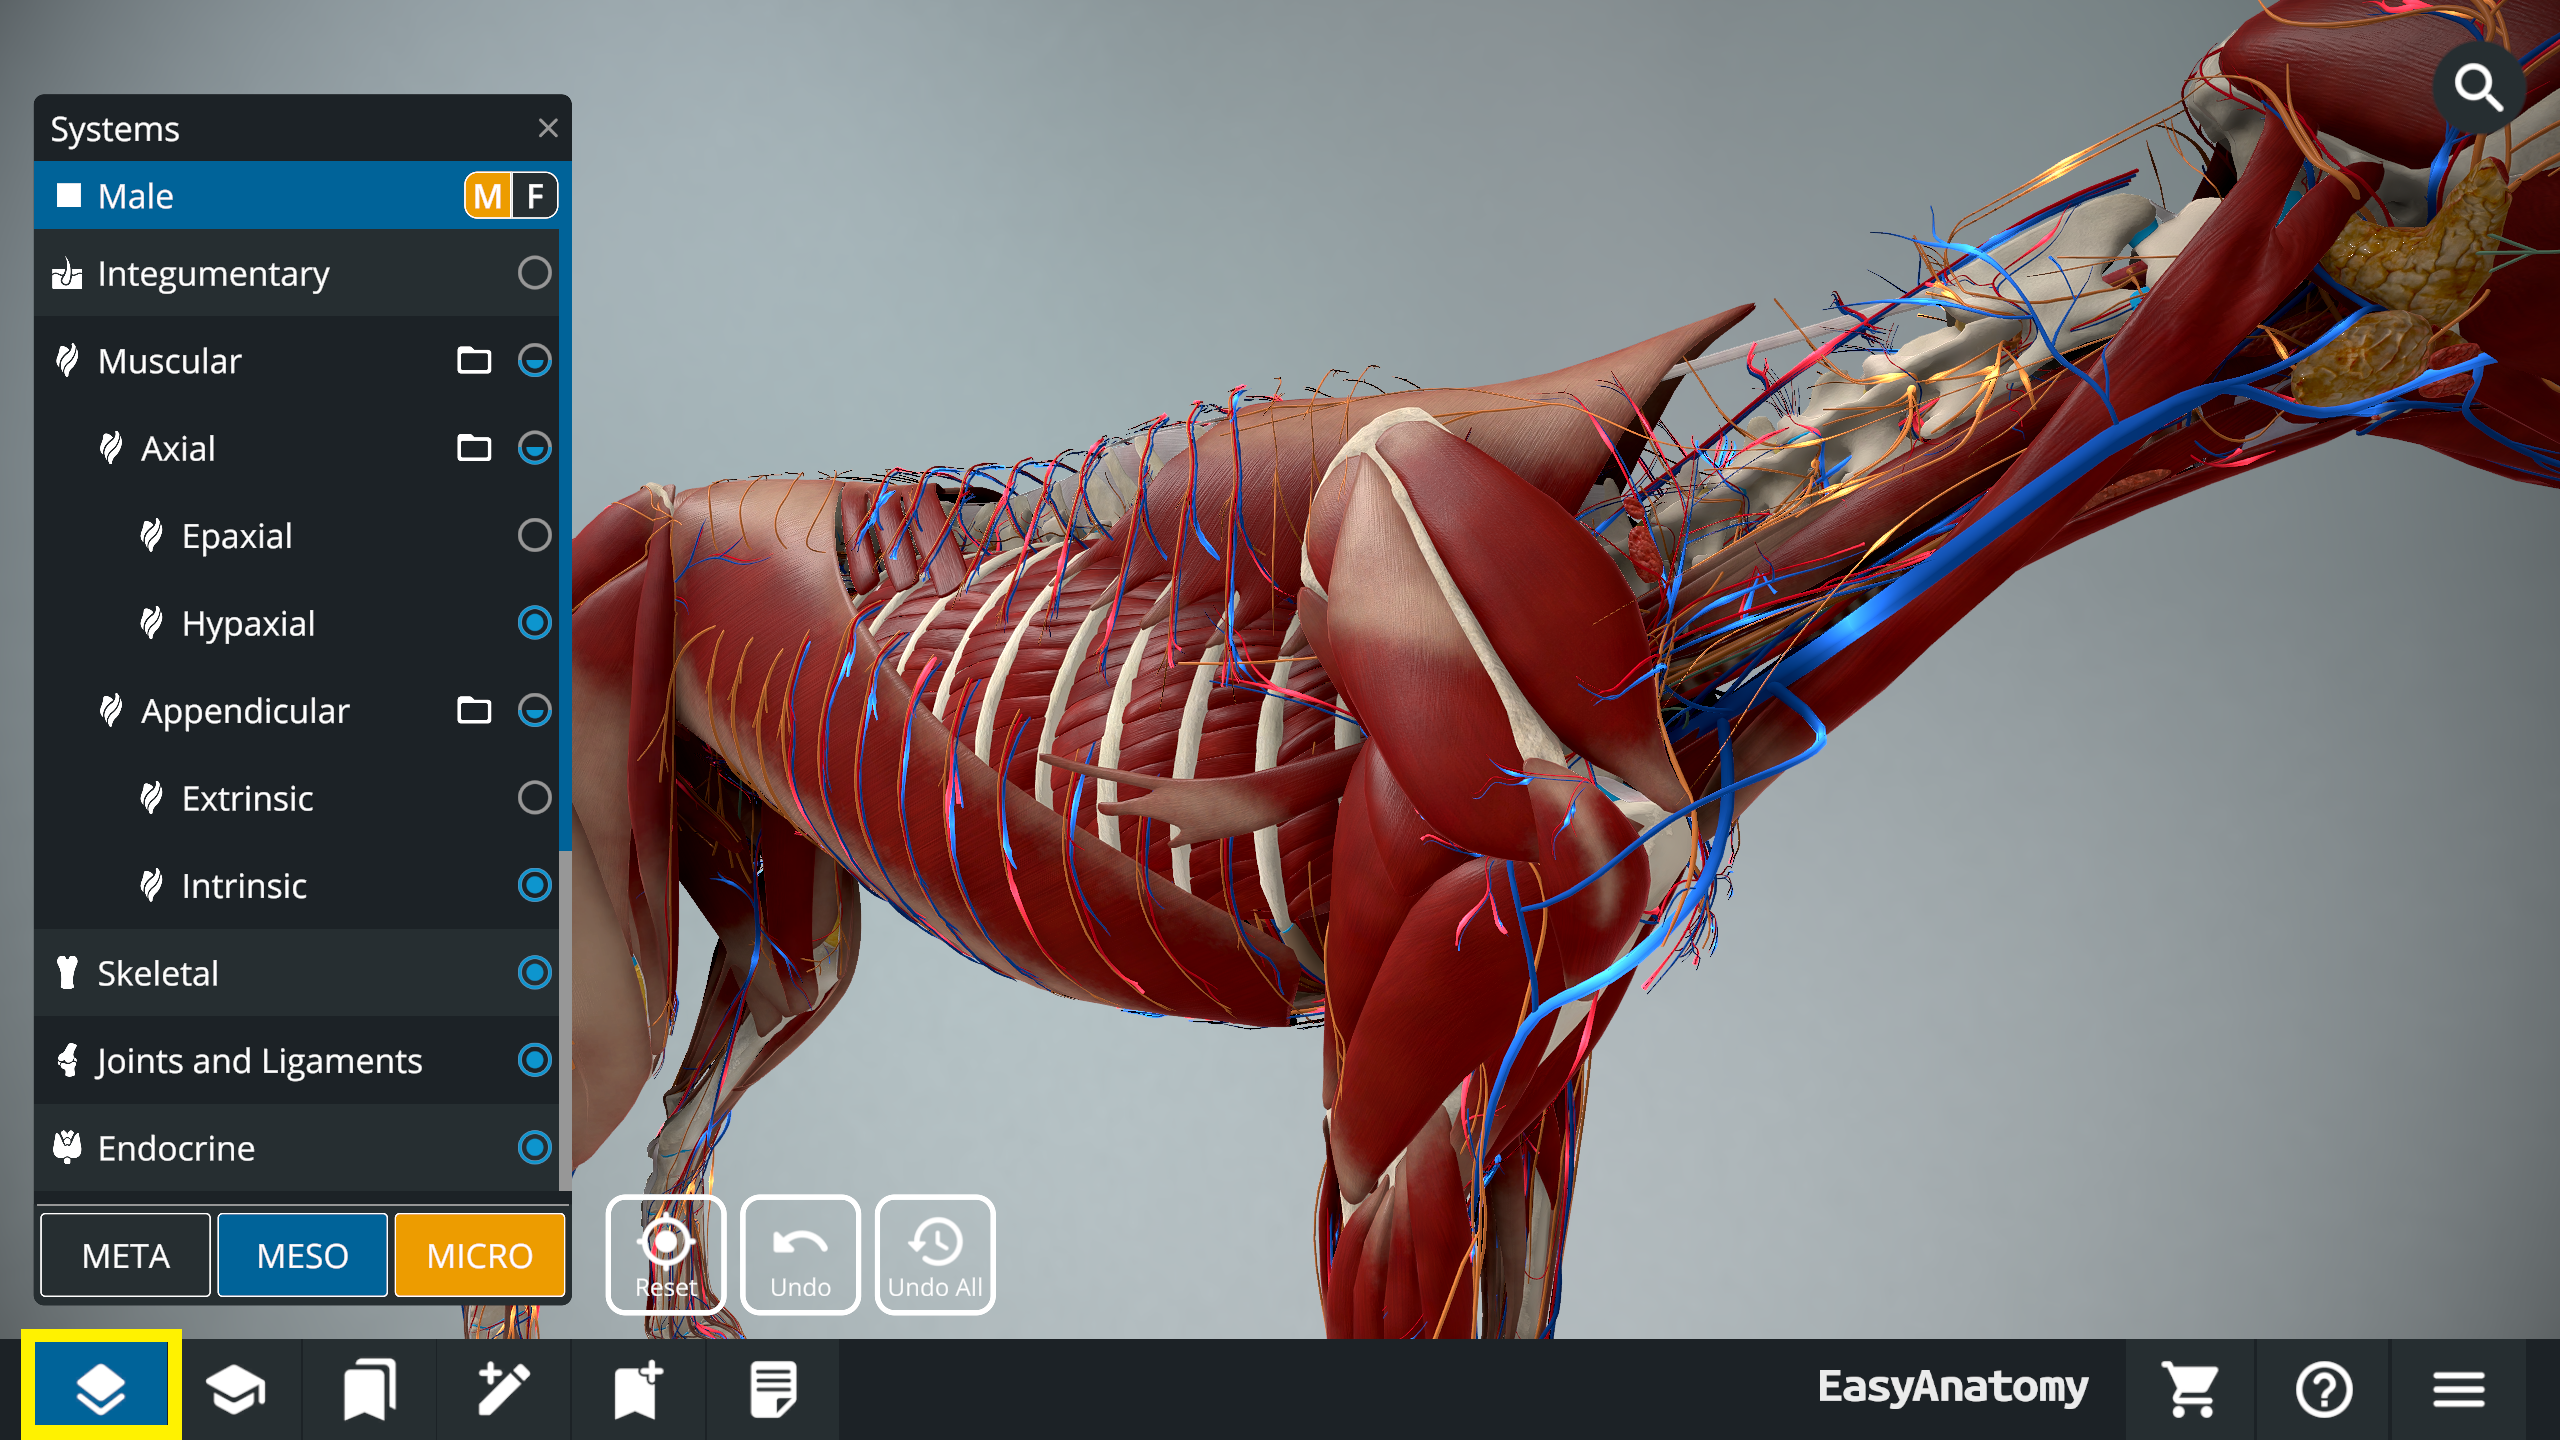
Use the Layers Panel to peel away layers and to select which labels are shown around the model.
Layers
View layers together or individually to gain an understanding of both the individual system components and the relationships between systems. Expand the Muscular, Circulatory, and Nervous layer menus to toggle on and off specific systems.
To show and hide layers
- Click the system name to show or hide the layer.
- When the circle is filled in, the layer is shown.
- When the circle is not filled in, the layer is hidden.
- Click the folder next to the system to expand or collapse the sub-menu.
Labels
Toggle the three tiers of labels on and off to change which labels are shown, from general regions all the way down to specific tubercles and processes. There are three types of labels:
- Meta identify regions
- Meso identify bones and groups of muscles
- Micro identify tubercles and processes
To change which labels are shown
- Click the any label button to turn that level of label on/off. The button is colored when it is on.
TIP: To see Micro labels, select a specific structure and zoom in.
Animations
View system animations such as the Heart, Arteries, Veins, and Peripheral Nervous system. Expand the Circulatory and Nervous layer menus to toggle on and off system animations.
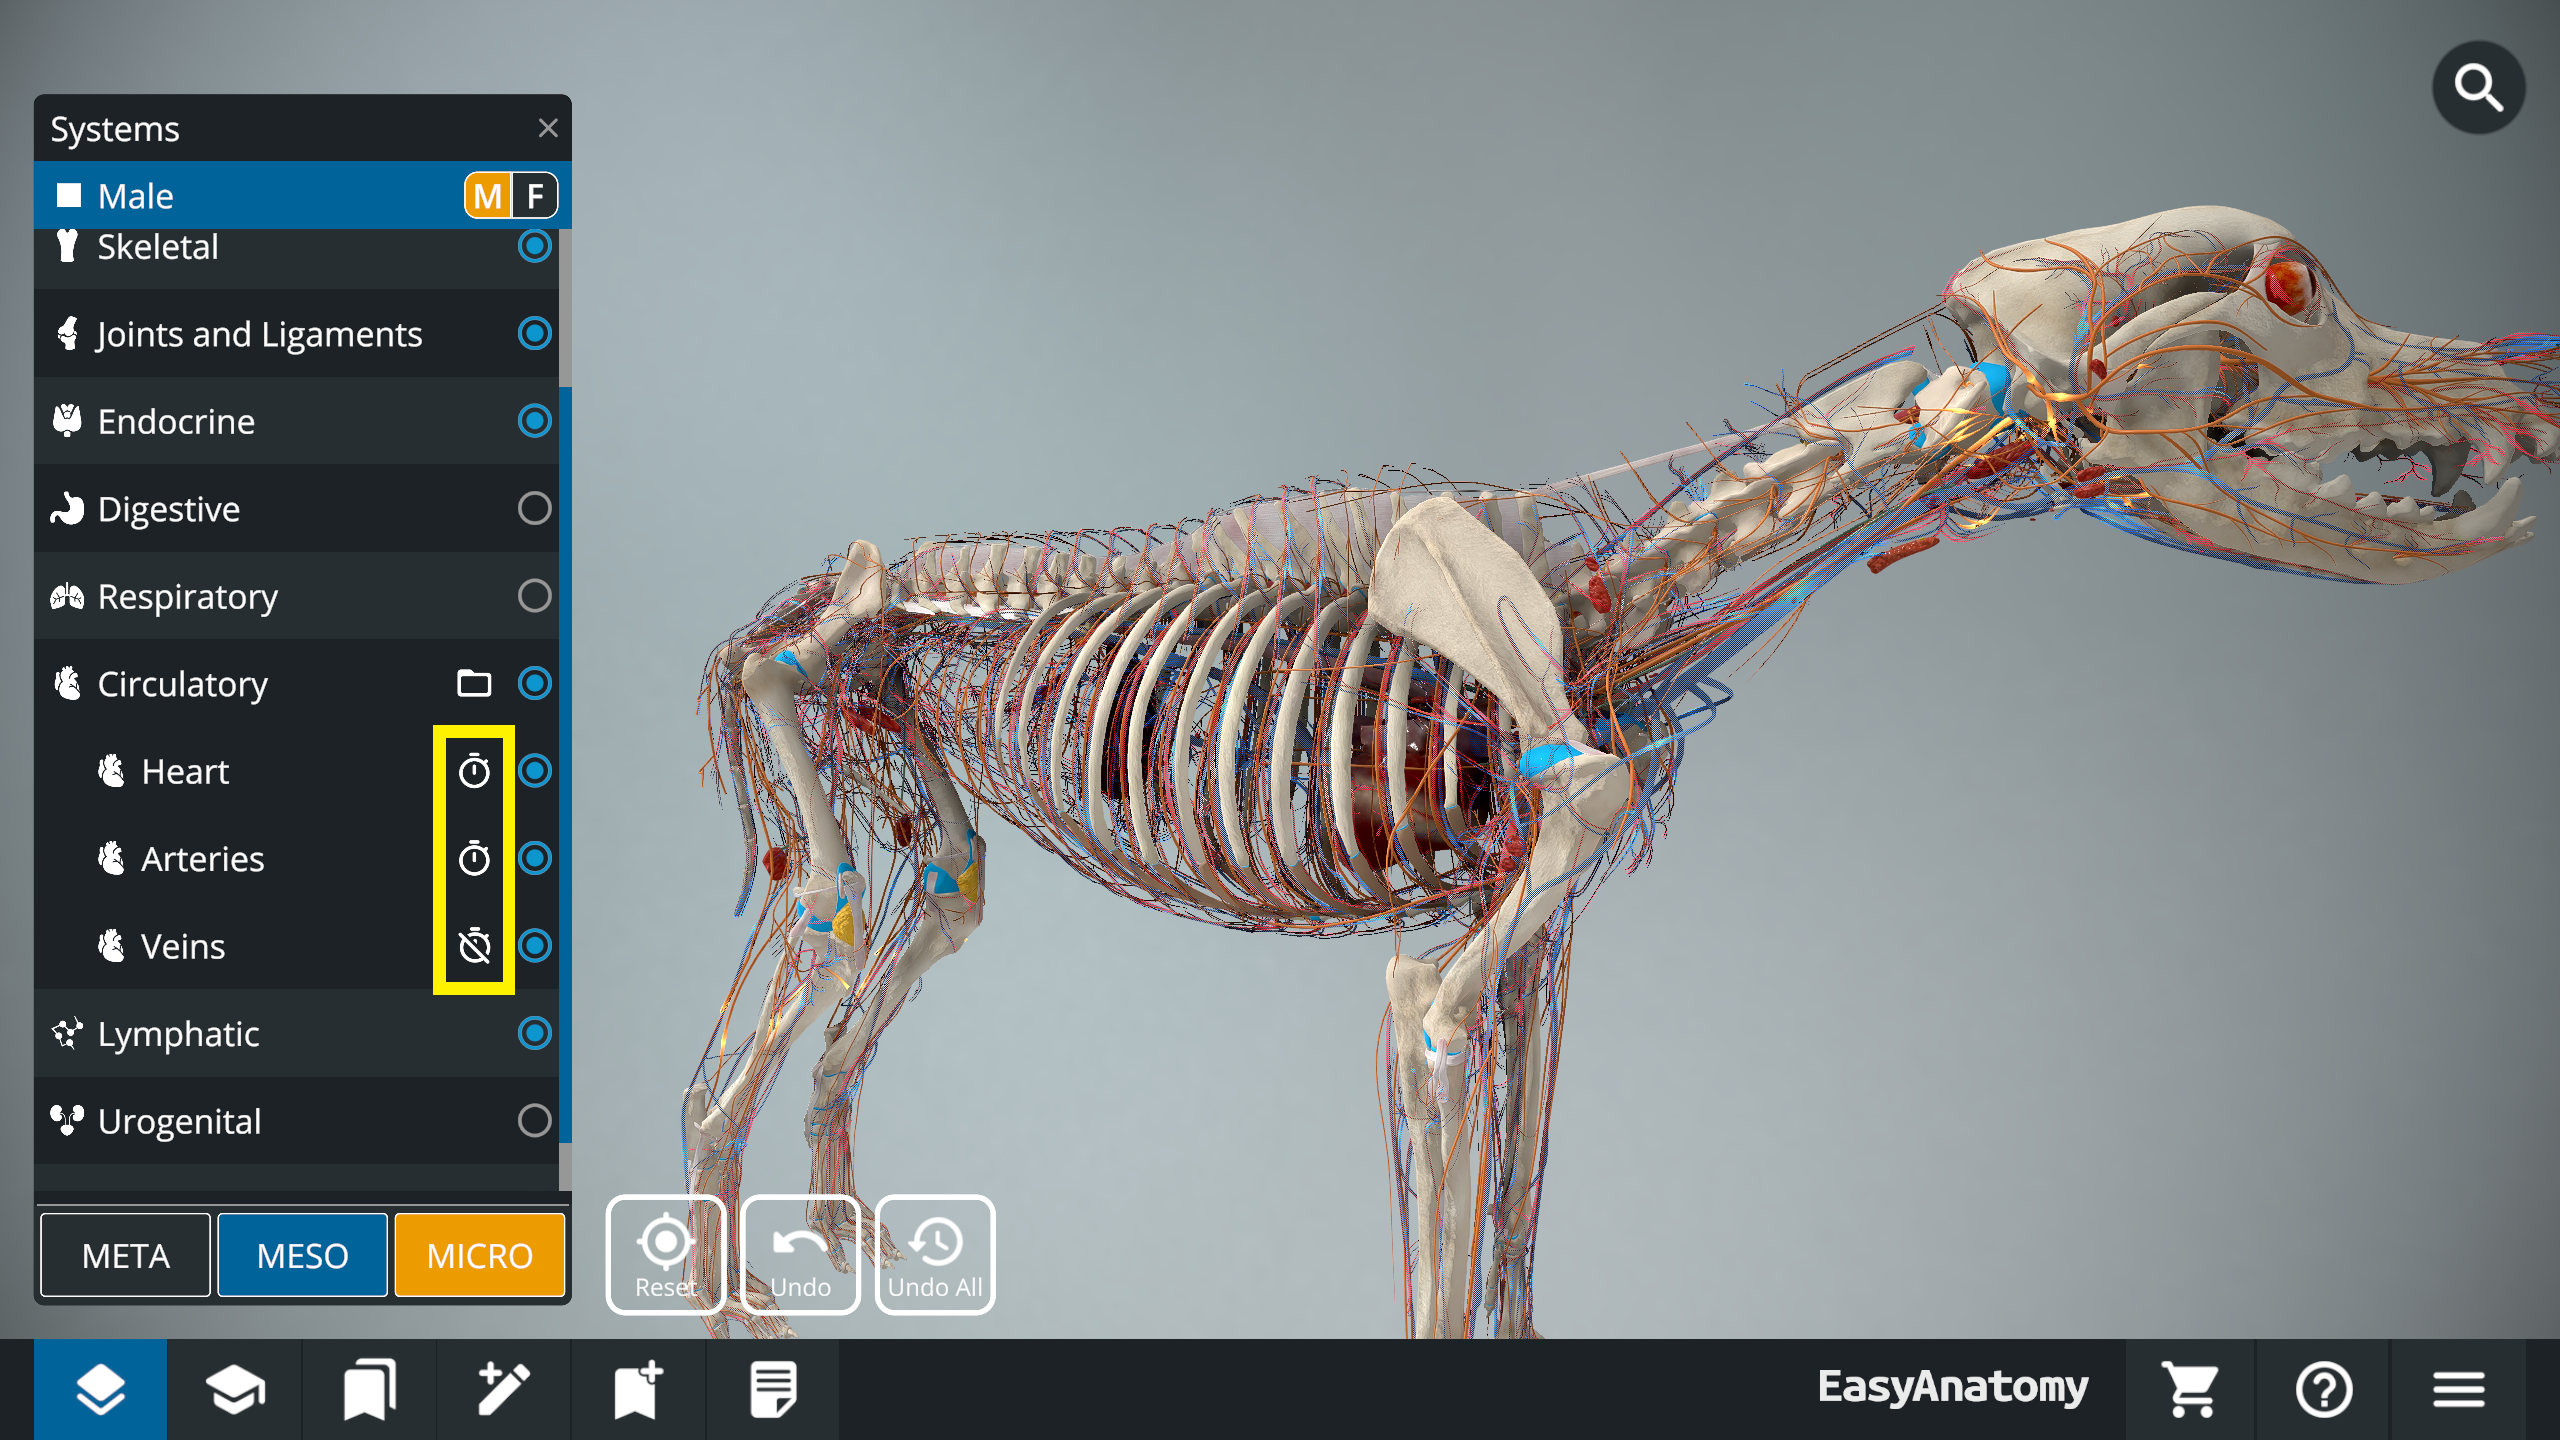
To show and hide animations
- Click the folder next to the Circulatory or Nervous system to expand the system sub-menu.
- Click the stopwatch icon next to the system name to show or hide the animation.
- When the stopwatch is crossed out, the animation is hidden.
Info Panel
Use the Info Panel to view more information related to the region, bone, or process you’re viewing.
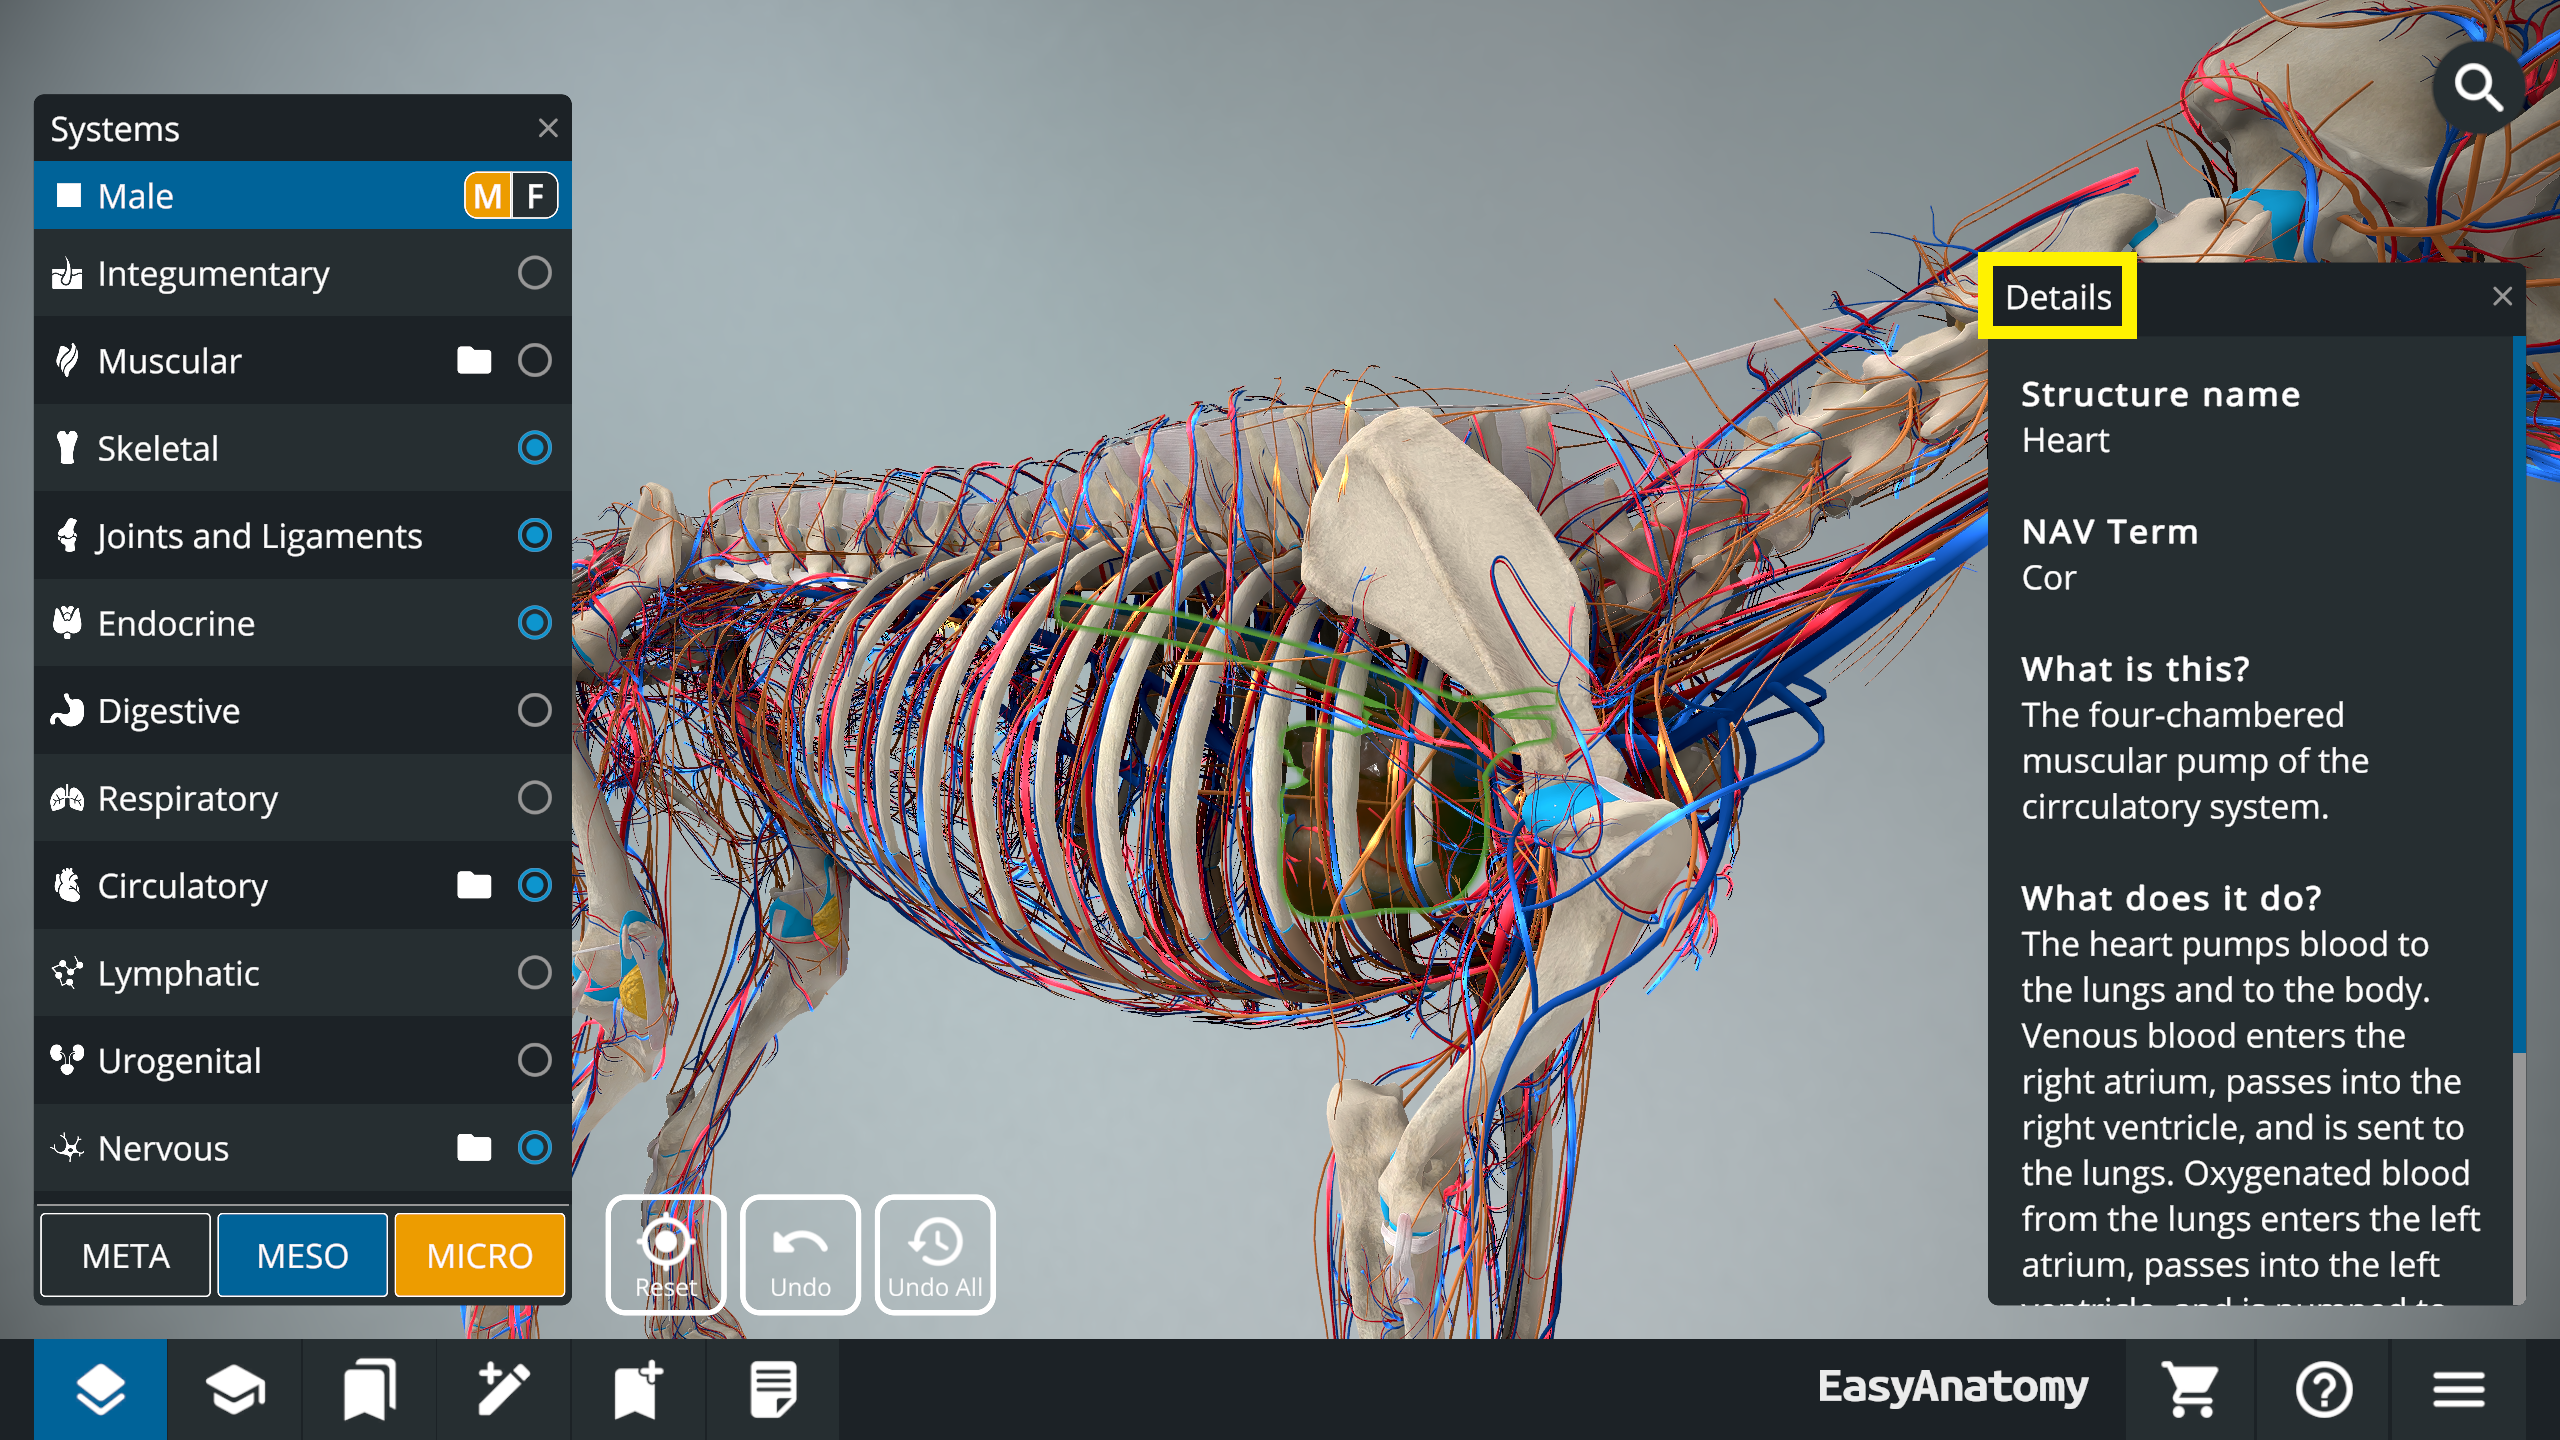
To view more information
- Click a component of the canine model, or a label. The Info Panel will display more information about that specific body part.
- To scroll through the content, place your cursor inside the Info Panel, then left-click and hold while dragging the mouse up and down.
TIP: The Info Panel only shows when there is information available on the selected component.
Notes
Add your own notes as you work to help you remember key ideas. Click the Notes icon to add, review, or delete notes.
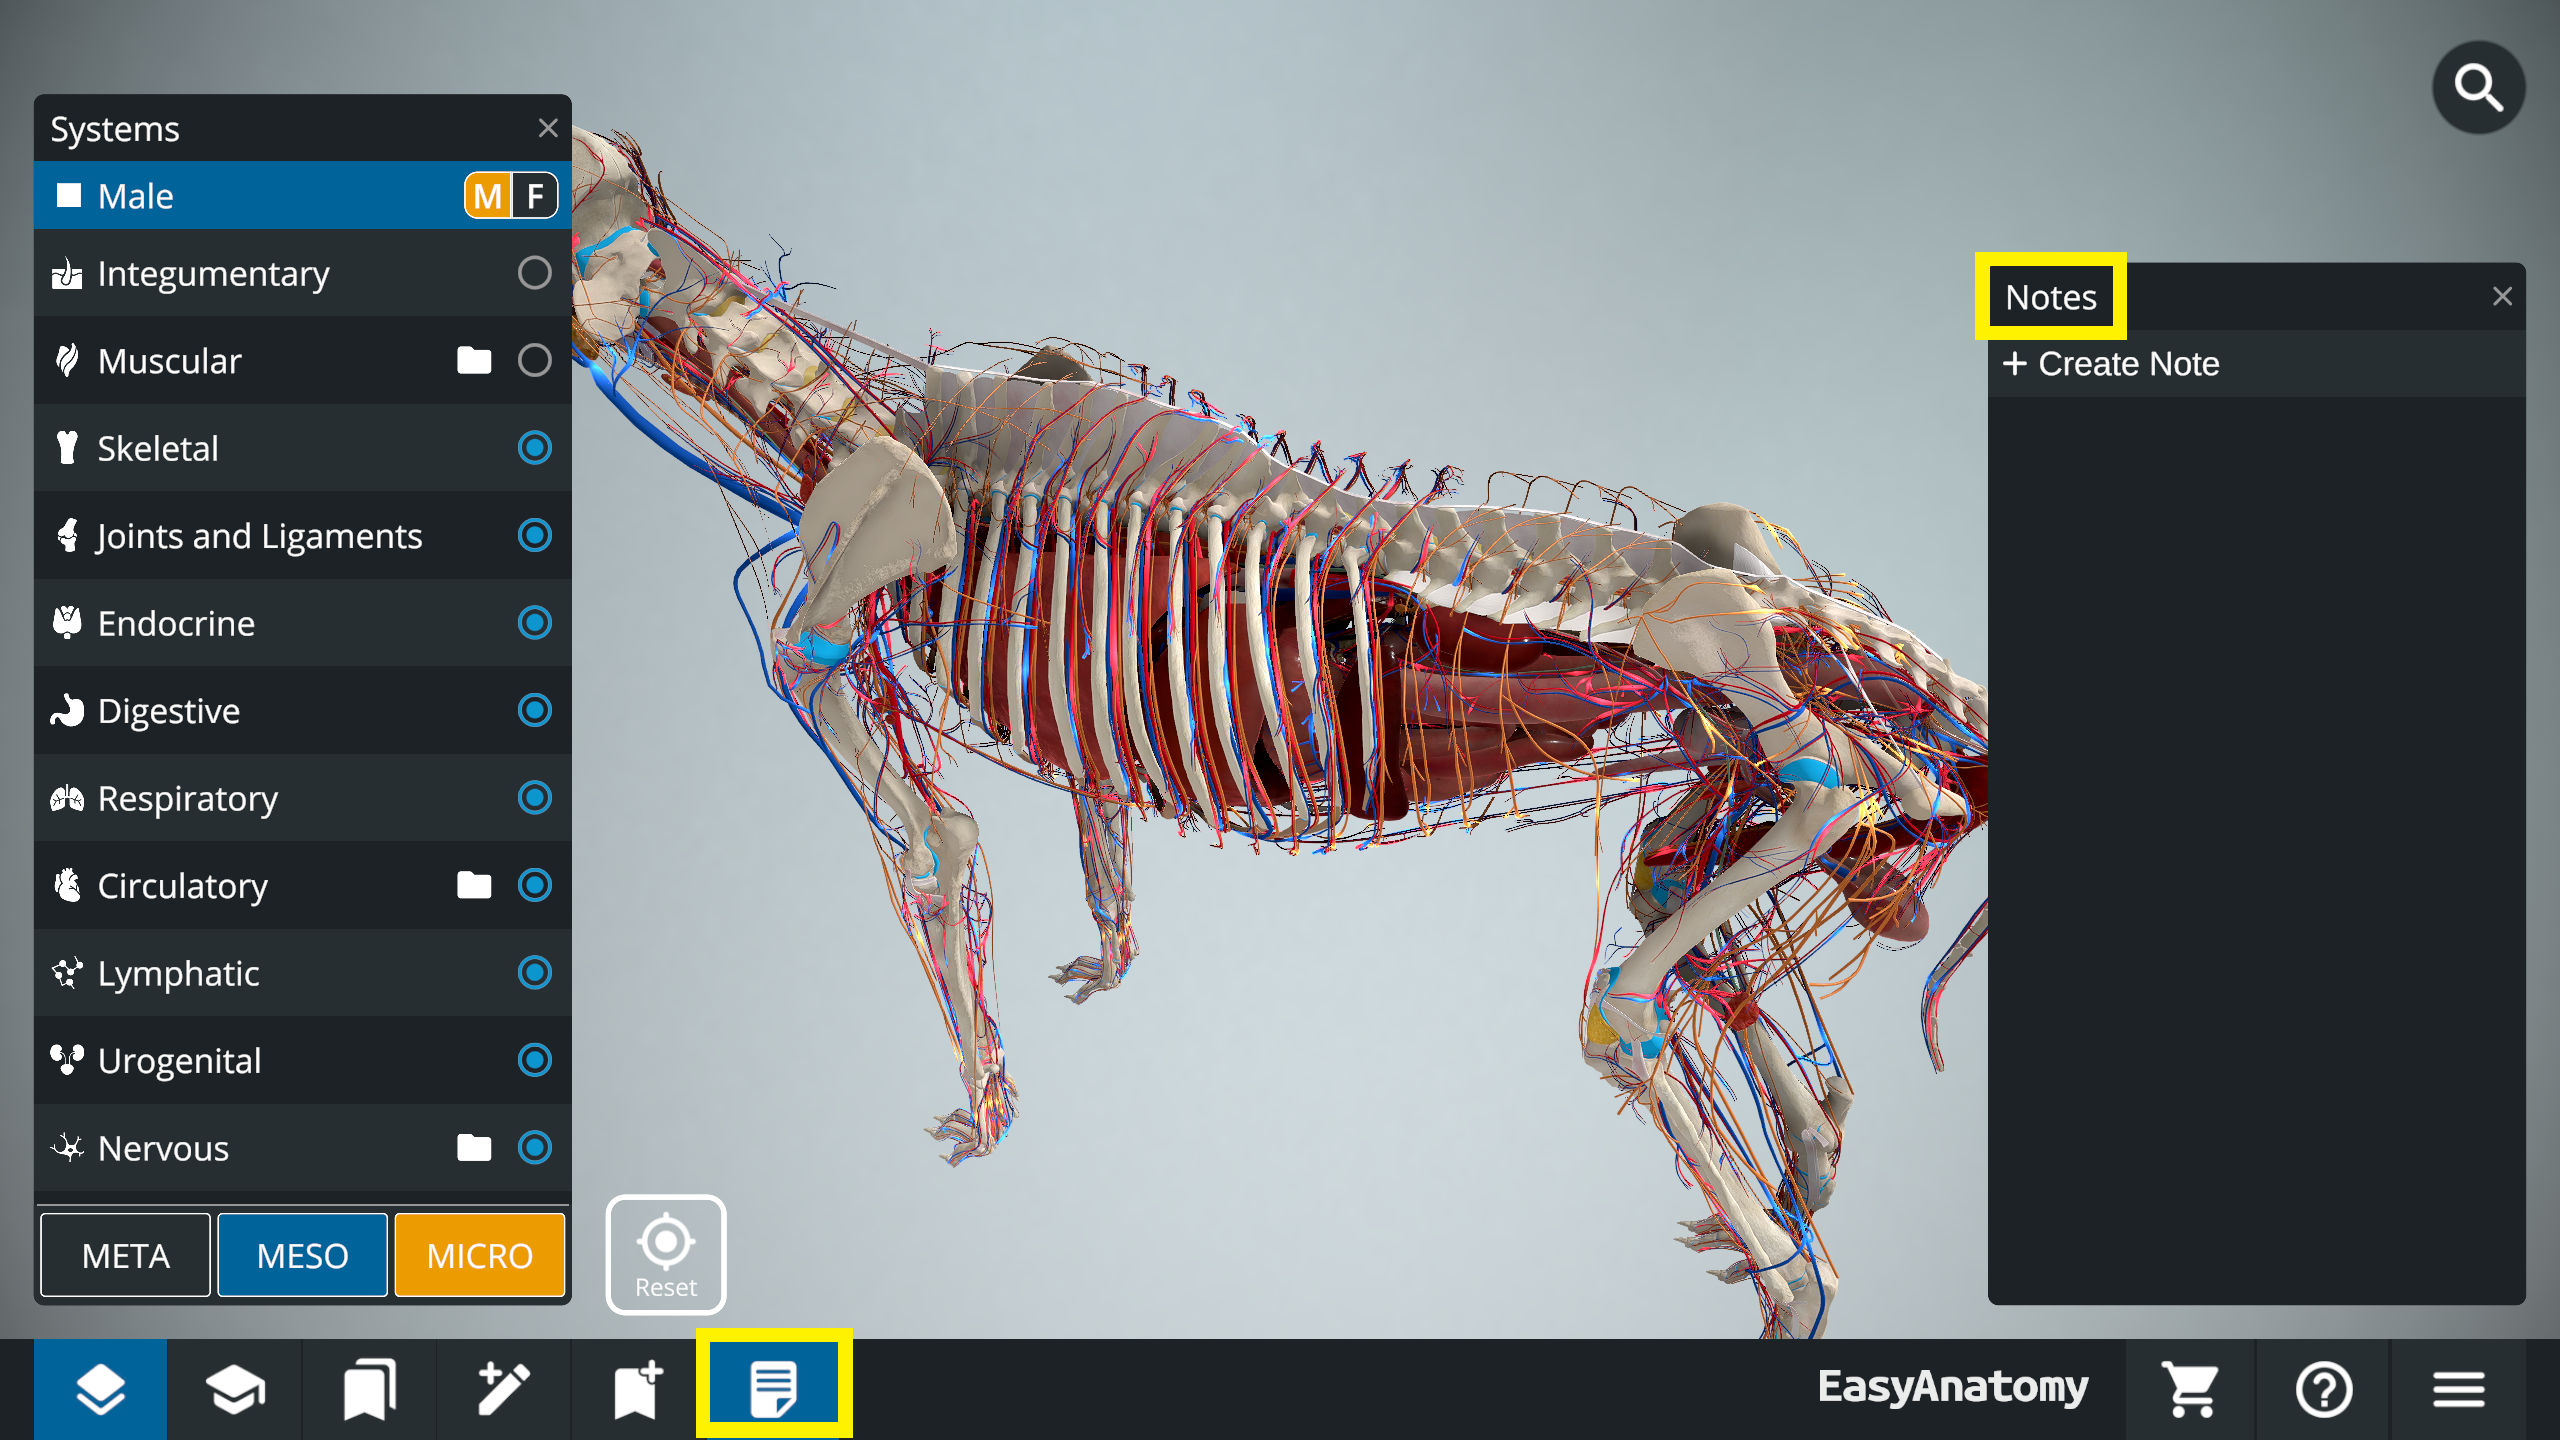
To add a note
- Click + Create Note and click on the “Write some Notes…” text to type your note.
- Click Close Note when you are done.
To delete a note
- Click the trash can icon beside the note to reveal the delete option.
- Click Delete.
Continue to Lesson 3: Inspecting & Analyzing for more Getting Started tips.
0 Comments